How to Use A DSLR Camera?
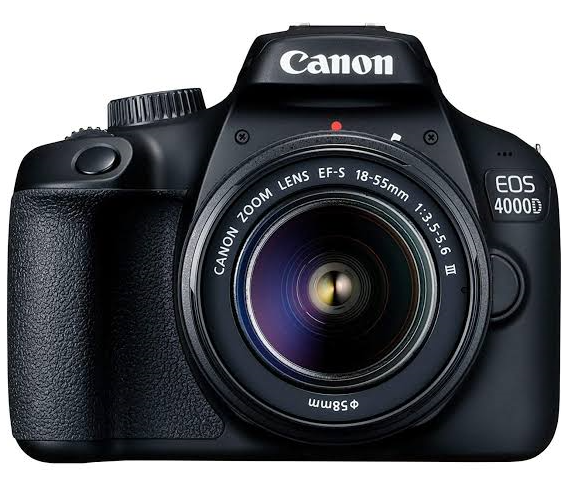
Dear aspiring geek, now you’ve got yourself a fancy new DSLR (Digital Single-lens Reflex) camera and you might have bought the best laptop under $700 or $1000 or so; you may be overwhelmed with it lengthy how-to manual, its bulky jargons and bottoms coming on all sides of your camera.
Straight out of the box, you might want to get your camera to action; but going through the bulky manual will take you a few days to get the hang of things. Worry less, this article is a one-stop guide to let you take total control of your camera without going through the hassle of your lengthy manual.
Although, it is not intended to be a substitute for your user manual; but it is indeed a quick guide to get you use your camera quickly and easily. So, where do you start using your DSLR camera to get the best out of it as a beginner.
Understanding The Basics Of The DSLR Camera
As a new user, the exasperating number of dials, settings and buttons can get you confused and intimidated. However, understanding the basics is a great stepping stone to using your camera more proficiently. In order to take control of your new DSLR camera, you must understand the following;
They’re a lot more than this to get the most out of your DSLR camera; but starting with this is a good start-off for beginners.
Now, let’s start digging deep into each of the above;
1 – Understanding Shooting Modes:
The first thing to understand about your DSLR camera is the shooting modes. Different shooting modes mostly determines how your camera will perform when you start clicking.
Shooting modes are generally represented on the screen of DSLR cameras, with abbreviations such as the following; Auto Mode (Av or Tv), Aperture Priority Mode (Av or A), Shutter Priority Mode (TV or S), Program Mode (P), and Manual Mode (M).
On the default, your camera is in Auto Mode!
Auto Mode (M): On this mode, your camera does everything including the speed of the shutter the aperture and the exposure of your image.
Aperture Priority Mode (Av or A): Also known as semi-automatic mode. In this mode, you do the aperture setting while your camera determines the shutter speed automatically.
Aperture determines the amount of light that passes through the shutter whenever it is opened. It is the opening that light passes through the lens. The bigger the aperture size the more the light that passes through the lens.
Shutter Priority Mode (TV or S): Opposite to aperture priority mode; here, your camera sort the aperture to give appropriate exposure while you figure the shutter speed required.
The lengthier it opens, the larger the amount of light that passes through the sensor. Short shutter speed is ideal for capturing objects in quick motion like action; sport and wildlife; while long shutter speed is deal for blurring moving objects.
Program Mode (P): In program shooting mode, as you adjust the shutter speed; the aperture will automatically adjust accordingly to give the correct exposure.
Hence, you need not worry about from one mode to another, an additional advantage over shutter or aperture shooting mode.
Manual (M): As the name implies, here, you have total control over all settings. From setting the shutter speed, the aperture and the exposure, with exposure indicator on the screen or viewfinder, to hint you on over or under exposure.
Factually, shutter speed and aperture priority mode are the best first approach to getting your camera off auto mode. They both offer simple and intuitive approach to teach you more about your camera; and learn to use different settings for more creativity.
2 – Understanding ISO
The degree of sensitivity of your camera sensor to light is called ISO. This is responsible for controlling the amount of light needed by the camera sensor for a given degree of exposure.
There are 2 known numerically represented ISO rating; low sensitivity (100) to high sensitivity (6400) or more.
At low sensitivity, it means your camera requires more light to attain a given exposure; while in high sensitivity, your camera requires lesser amount of light to attain the same exposure.
So when shooting outdoors where there is more light such a bright sunny day, low ISO will do and will give you high quality images. But when inside, with little light available, such as dark room or library, you should use high ISO number.
3 – Understanding Exposure
To take total control of your camera, it’s pertinent you understand that ISO, shutter speed and aperture constitute what is called the exposure triangle, hence they are all connected and crucial it is, understanding their relationship.
As a beginner, combining auto ISO mode with the semi-automatic shooting modes is a big step to avoid adjusting your exposure; as it requires some bit of calculation and technicality. However, understanding the interwoven connection of the exposure triangle and its practical implication is what pro do; and you may need time to master that.
4 – Understanding Exposure Compensation

You already know your camera default metering exposure is 18% grey, for both under or over exposed scene.
For you to either decrease or increase metering when you need actual visualization of a scene; there are exposure compensation button (+/- button) very close to the shutter.
So, when your scene is bright and your camera render it dark, you can use the positive button to allow your camera render the scene above 18% i.e. lighter than middle grey. Likewise, if your scene is darker and your camera render it too light, you can use the negative exposure button to allow your camera render the scene below 18% middle grey i.e. darker then middle grey.
5 – Understanding Metering
Whenever you take shot in either auto or semi-automatic mode, your camera analysis the whole scene based on the available light, it then calculates the exposure to an average of 18% grey image, known as the middle grey. This process is called metering, it is responsible for that dark image from a brighter scene and also that bright image from a darker scene as you see it.
Generally, metering modes are of three types,
- Average Metering: This is what your camera does as stated above.
- Centre-Weighted: In this mode, your camera neglects the extreme edges of the image, focusing on the center area of the viewfinder and assessing up to an estimated 80% of the entire scene.
- Spot Metering: In this mode, your camera assesses dark and light tones in only a very small scope of the entire scene, using the center of the viewfinder to form a circle of an estimated 5% of the whole scope. After making this assessment, it then exposes the whole scene to 18% grey middle grey.
Factually, it’s preferable to start with either center weighted or average metering modes. You will get frequent measurements of the exposure and by that, learn and understand how to determine maybe your scene is under or over exposed. Irrespective of how you see it.
6 – Understanding Autofocus
Capturing without focus is just like a journey without a destination, no matter what settings you put your camera on, there is always something you want to focus on in your image.
DSLR cameras have several autofocus modes, but the two mostly used and simplest are the AF-S (Autofocus Single) and AF-C (Autofocus Continuous). Autofocus Single are best for stationary objects such as buildings, landscapes. Autofocus Continuous are best for action and moving objects, your camera refocuses all time the image moves until capture.
7 – Understanding File Size and File Type
DSLR camera gives users the opportunity to save picture in different file sizes and types. To ensure you get the most out of your camera megapixel, you should select the highest file size possible. You can as well decide which file type you want your camera to record your images, either JPEG or raw file type.
JPEG is the most advisable file format you should select. With it, your camera will automatically process the image and make them print-ready immediately after capture. However, if you desire a software post processing session for your image, you can send the raw file to your laptop through Bluetooth or USB.
JPEG is a compressed file type making it smaller in size, while the raw file is an uncompressed type of an image, they are usually larger in size because they contain a lot of image data.
Conclusion About Your DSLR Camera
Now, you’ve known enough about your DSLR camera to get off auto mode, so when your images are not turning out the way you want them, you can start exploring by adjusting the settings little by little till you get the total hang. You already have the basic know-how about the settings, modes and buttons of your camera. And you can even use your raw image to do more, if you own a laptop that’s capable of running image processing software.

Author Bio
Jeff Finder is a Digital Nomad who travels around the world and blog about technology, gadgets and specifically laptops at Laptopcut.com. He’s also an international speaker and love to persuade youth to find their voice online and make it count.
To learn more about using your DSLR Camera to the fullest, here is an excellent course by Master Photographer Evan Sharboneau.
© Copyright Easy to Retire since 2017 and to date!